

 Manufacturers
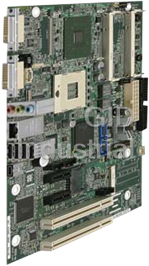
RADISYS CE915GM

Description
CE915GM COM EXPRESS MODULE
Part Number
CE915GM
Price
Request Quote
Manufacturer
RADISYS
Lead Time
Request Quote
Category
Single Board Computers
Specifications
Form Factor
COM Express
System Chipset
Intel ICH
Audio
Intel High Definition Audio (HDA) or AC'97 2.3 CODEC
BGA options
1.5GHz Celeron M 370, 1.0GHz ULV Celeron M 373, 1.4GHz LV Pentium M 738, 2.0GHz Pentium M 760
BIOS
Phoenix FirstBIOS Notebook Pro BIOS in 1MB Firmware Hub (FWH)
Board Type
COM Express
Chipset
Mobile Intel 915GM Express chipset with ICH6-M I/O Hub chipset
Compliance
PICMG COM Express R1.0 basic form factor, type 2
Connectors
COM Express 440pin (two 220-pin, 0.5mm pitch receptacle)
Dimensions
95mm x 125mm - COM Express basic form factor
Front Side Bus (FSB)
400/533 MHz
IDE
One Ultra ATA100/66/33 port
L2 Cache
2MB Pentium M 1MB Celeron M, 512MB ULV Celeron M
Memory Capacity
Maximum 1G (Gbit technology), minimum 128MB
Memory Type
200-pin SO-DIMM socket for up to 1G DDR2-400/533MHz memory (PC2-3200/43002) Non-ECC
Network
IEEE 802.3 10/100/1000Base-T compliant physical layer interface
OS Support
Windows XP, Windows XP Embedded, Red-Hat Desktop Linux, Windows 2000, MontaVista® Linux Professional Edition, VxWorks 5.5, OS/9, QNX Neutrino
PCI
PCI 2.3 32-bit 33MHz, six logical devices
PCI Express
Three x1 interfaces
Power Management
S0, S3, S4 and S5
Power Requirement
+12V input from carrier board, + 5V standby
Processor
Intel Pentium M
SATA
Two SATA 150 ports
USB
Eight USB 2.0 ports
Video
Intel Integrated chipset graphics supporting dual independent displays; Dual SDVO; LVDS 18-bit dual channel; Analog VGA; TV-Out PCI Express x16 external graphics port (multiplexed on DVI interface pins)
Datasheet

Extracted Text
PROCELERANT™ CE915GM COM EXPRESS MODULE QUICK START GUIDE CE760A-0 CE738A-0 CE373A-0 CE370A-0 CE738A-E-512 www.radisys.com 007-02531-0000 April 2007 Release history Release Date Description -0000 April 2007 First release, introducing CE760A, CE738A, CE373A, and CE370A modules. Copyright © 2007 by RadiSys Technology (Ireland) Ltd. All rights reserved. Portions of this manual are copyrighted by the PCI Industrial Computer Manufacturers Group, and are reprinted with permission. RadiSys is a registered trademark and Procelerant is a trademark of RadiSys Corporation. PICMG is a registered trademark and COM Express is a trademark of the PCI Industrial Computer Manufacturers Group. Intel and Celeron are registered trademarks and Intel Core is a trademark of Intel Corporation. Micro Memory is a trademark of Micro Memory LLC. Microsoft, Windows, and Windows XP are registered trademarks of Microsoft Corporation. Red Hat and Red Hat Linux are registered trademarks of Red Hat, Inc. Linux is a registered trademark of Linus Torvalds. Phoenix is a registered trademark and FirstBIOS is a trademark of Phoenix Technologies. All other trademarks, registered trademarks, service marks, and trade names are the property of their respective owners. TABLE OF CONTENTS Preface ............................................................................................................................ 5 About this guide................................................................................................................................. 5 Where to get more information..................................................................................................... 5 Safety notices...................................................................................................................................... 5 Lithium cell battery ................................................................................................................................ 5 Electrostatic discharge ........................................................................................................................... 6 Chapter 1: Checking your order................................................................................... 7 COM Express module product codes........................................................................................... 7 CR100 carrier board product codes...............................................................................................7 Optional components....................................................................................................................... 8 Memory modules................................................................................................................................... 8 Fansinks .................................................................................................................................................... 8 Video adapter.......................................................................................................................................... 10 Chapter 2: Preparing Components and Accessories................................................. 11 Preparing COM Express components........................................................................................... 11 Power supply...................................................................................................................................... 12 CD-ROM.............................................................................................................................................. 12 Hard disk ............................................................................................................................................. 12 Keyboard and mouse....................................................................................................................... 12 Video devices...................................................................................................................................... 13 DVI and VGA Monitors.......................................................................................................................... 13 LVDS panel............................................................................................................................................... 13 TV or other S-Video devices................................................................................................................. 13 Ethernet ............................................................................................................................................... 13 Miscellaneous attachments ............................................................................................................. 13 3 Chapter 3: Identifying Key Components..................................................................... 15 COM Express module layout.......................................................................................................... 15 CR100 carrier board layout.............................................................................................................. 16 Chapter 4: Assembling the Module and Carrier Board ............................................ 17 Install the memory module............................................................................................................. 17 Install the fansink............................................................................................................................... 18 Install the module assembly on the carrier board..................................................................... 24 Install the CR100 carrier board in the chassis ............................................................................. 26 Connect internal devices and set jumpers................................................................................... 26 Connect external I/O devices and chassis components........................................................... 28 Power on the system........................................................................................................................ 29 Check the BIOS settings................................................................................................................... 29 Chapter 5: Installing Operating System and Drivers ................................................. 31 Install the operating system ............................................................................................................ 31 Install drivers....................................................................................................................................... 31 4 PREFACE About this guide Procelerant™ COM Express™ family products are designed to provide a wide range of processor options enabling high reuse and interchangeability of COM Express modules and carrier boards. Additionally, all CE915GM COM Express modules, their heatsink assemblies, and the CR100 carrier boards are RoHS compliant. This guide is for the technician or engineer who will physically install the Procelerant COM Express embedded computing module on an application-specific carrier board. The Procelerant CR100 FlexATX carrier board was designed for this purpose, and is used as the sample carrier board in this guide. For detailed information and technical specifications, refer to the Procelerant CE915GM COM Express Module Product Manual available on the RadiSys Web site, www.radisys.com. For information about the CR100 carrier board, refer to the Procelerant CR100 FlexATX Carrier Board Product Manual. Where to get more information Please visit the RadiSys® Web site at www.radisys.com for product information and other resources. Downloads (manuals, release notes, software, etc.) are available via the Technical Support Library product links at www.radisys.com/support or the product pages at www.radisys.com/products. Safety notices Lithium cell battery WARNING The CR100 carrier board contains a lithium cell battery. DANGER OF EXPLOSION IF BATTERY IS INCORRECTLY REPLACED. Replace only with the same or equivalent type recommended by the manufacturer. Dispose of batteries according to the manufacturer's instructions. When removing or replacing the lithium cell, do not use a conductive instrument, as a short-circuit may cause the cell to explode. Always replace the cell with one of the same type. This product uses a CR2032 cell. Dispose of a spent cell promptly—do not recharge, disassemble, or incinerate a cell. Keep cells away from children. 5 Electrostatic discharge WARNING This product contains static-sensitive components and should be handled with care. Failure to employ adequate anti-static measures can cause irreparable damage to components. Electrostatic discharge (ESD) damage can result in partial or complete device failure, performance degradation, or reduced operating life. To avoid ESD damage, the following precautions are strongly recommended. Keep each module/PCB in its ESD shielding bag until you are ready to install it. Before touching a module, attach an ESD wrist strap to your wrist and connect its other end to a known ground. Handle the module only in an area that has its working surfaces, floor coverings, and chairs connected to a known ground. Hold modules only by their edges and mounting hardware. Avoid touching PCB components and connector pins. For further information on ESD, visit www.esda.org. 6 CHECKING YOUR ORDER 1 Check the RadiSys product codes on the Procelerant COM Express module, CR100 carrier board, and accessories to make sure you received the correct products for your application. COM Express module product codes The following table lists the CE915GM modules available at the time of publication. Check the CE915GM product page on the RadiSys Web site or contact your sales representative for the latest information about product offerings. Note that memory modules are not necessarily included and must be purchased separately. Product code Description ® ® CE760A-0 CE915GM with Intel 2GHz Pentium M 760 BGA processor, no memory module, RoHS CE738A-0 CE915GM with Intel 1.4GHz LV Pentium M 738 BGA processor, no memory module, RoHS CE373A-0 CE915GM with Intel 1.0GHz ULV Celeron M 373 BGA processor, no memory module, RoHS ® CE370A-0 CE915GM with Intel 1.5GHz Celeron M 370 BGA processor, no memory module, RoHS CE738A-E-512 CE915GM with Intel 1.4GHz LV Pentium M 738 BGA processor, 512MB memory module, with extended temperature to -25ºC to 70ºC, RoHS CR100 carrier board product codes This guide assumes that you will use the CR100 carrier board with the COM Express module. Two CR100 carrier board options are available to accommodate your graphics requirements. Product code Description CR100-2DVI Flex ATX Carrier, Dual DVI CR100-PCIE16 Flex ATX Carrier, PCIE x16, SVGA 7 1 Checking your order Optional components Memory modules The COM Express module requires one memory module to operate. For supported memory module options that have been validated for use with these COM Express modules, refer to the Procelerant CE915GM Memory Validation List documentation on the RadiSys Web site. Fansinks The table below lists the product codes of fansinks offered by RadiSys. A complete list of all the components in each fansink kit is provided in the tables that follow. Product code Description CE-AHSA Active heatsink assembly (a fan is built into the heatsink) for any COM Express module in a 2U chassis. The power connector for the CE-AHSA fansink is ATX-compliant. Heatsink dimensions: 125 x 95 x 26.90mm Fansink dimensions: 80 x 80 x 15mm Fansink power supply: +5V to +13.8V (+12V recommended) CE-PHSA A passive heatsink for any COM Express module in a 1U chassis. A chassis fan is required with this option. Dimensions: 125 x 95 x 26.90mm CE-PHS17A A 17mm low-profile passive heatsink for COM Express modules CE373A or CE738A in a 6HP (ATCA) blade. An air velocity of 400 lfm [2 m/sec] is required. Use with CE738A requires a chassis fan. Dimensions: 125 x 95 x 14.94mm CE-HSPA Heat spreader for CE760A, solid aluminum, compliant with PICMG COM.0 COM Express specification Revision 1.0 Dimensions: 125 x 95 x 11mm CE-TIM Thermal compound application bar, phase change at 58ºC (136ºF) 8 1 Optional components CE-AHSA package contents Product code Description QTY Part number Backer plate 41x36mm, sheet metal (supplied with four M2 flat head 1 010-02709-00xx screws) CE-AHSA Aluminum active fansink, 125x94x42mm, 12V input 1 019-00352-00xx Carrier screws M2.5x0.45x4mm, pan head (used to tighten the carrier 5 09-0293-00xx board and module) Heatsink screws M2.5x0.45x16mm, pan head (used to tighten the heatsink 5 009-01707-00xx and module) Heatsink spacer M2.5 clear, 4.5mm outside diameter, 6mm long 1 009-01587-00xx Module screw M2.5x0.45x12mm, pan head (used with the heatsink 1 09-0344-00xx spacer) Standoffs M2.5x0.45x5mm, hex jam, 4.5mm outside diameter 5 009-01190-00xx Washers 2.5mm inside diameter, spring lock (used with heatsink 5 009-01208-00xx screws) CE-PHSA package contents Product code Description QTY Part number Backer plate 41x36mm, sheet metal (supplied with four M2 flat head 1 010-02709-00xx screws) CE-PHSA Aluminum active fansink, 125x94x27mm, 12V input 1 019-00352-00xx Carrier screws M2.5x0.45x4mm, pan head (used to tighten the carrier 5 09-0293-00xx board and module) Heatsink screws M2.5x0.45x16mm, pan head (used to tighten the heatsink 5 009-01707-00xx and module) Heatsink spacer M2.5 clear, 4.5mm outside diameter, 6mm long 1 009-01587-00xx Module screw M2.5x0.45x12mm, pan head (used with the heatsink 1 09-0344-00xx spacer) Standoffs M2.5x0.45x5mm, hex jam, 4.5mm outside diameter 5 009-01190-00xx Washers 2.5mm inside diameter, spring lock (used with heatsink 5 009-01208-00xx screws) 9 1 Checking your order CE-PHS17A package contents Product code Description QTY Part number Backer plate 41x36mm, sheet metal (supplied with four M2 flat head 1 010-02709-00xx screws) CE-AHSA Aluminum active fansink, 125x95x17mm, 12V input 1 019-00352-00xx Carrier screws M2.5x0.45x4mm, pan head (used to tighten the carrier 5 09-0293-00xx board and module) Heatsink screws M2.5x0.45x16mm, pan head (used to tighten the heatsink 5 009-01707-00xx and module) Heatsink spacer M2.5 clear, 4.5mm outside diameter, 6mm long 1 009-01587-00xx Module screw M2.5x0.45x12mm, pan head (used with the heatsink 1 09-0344-00xx spacer) Standoffs M2.5x0.45x5mm, hex jam, 4.5mm outside diameter 5 009-01190-00xx Washers 2.5mm inside diameter, spring lock (used with heatsink 5 009-01208-00xx screws) Video adapter If you are using the CR100 carrier board and need to attach a VGA monitor to a DVI-I port, a DVI-to-SVGA adapter is required. Refer to DVI and VGA Monitors on page 13 for further information on VGA support on DVI-I ports. Product Code Description DVI-to-SVGA adapter CE-DVI-VGA 10 PREPARING COMPONENTS AND ACCESSORIES 2 Preparing COM Express components Lay out all the components on a grounded work surface as shown in Figure 1, “Basic component preparation,” on page 11 to prepare for assembly. Note that you may have different parts depending on what you ordered. Figure 1. Basic component preparation 4 5 6 7 8 3 9 10 2 11 1 Item Component description Item Component description 1 COM Express module 7 Heatsink spacer and module screw 2 DDR2 memory module 8 Heatsink screws 3 Active fansink assembly 9 Washers (use with item 8) 4 Fansink backer plate (supplied with four M2 flat 10 Carrier screws head screws) 5 Phase-change thermal interface material, 11 CR100 FlexATX carrier board ® Thermstrate TC 6 Standoffs (use with items 8 and 9) 11 2 Preparing Components and Accessories Power supply The COM Express module will work with an ATX-compliant power supply or a power supply that is compliant with PICMG COM.0 COM Express Specification Revision 1.0. When selecting a power supply, be sure to consider the maximum power, AC input, frequency, input current, and DC out specifications of the power supply. Theoretically, COM Express modules require at least 8A on the +12V power rail. Considering the power consumption of the carrier board, though, it is best to allow a certain amount of leeway on the two power rails. For this reason, the power supply should be rated above 200 Watts with at least 12A output on the +12V power rail. A typical power supply for the CR100 Flex ATX carrier board may have these specifications: Type: ATX Max Power: 350W AC input: 100–120V AC, 200–240V AC Frequency: 50/60Hz Input current: 10 A @ 115 V, 6 A @ 230 V DC output: Voltage +3.3V +5V +12V -5V -12V +5V Standby with 12V power supply Current 14A 30A 15A 0.5A 0.8A 3.0A Note It is recommended that you use an ATX P4 power supply with a 24-pin cable, which is typically labeled “BTX.” A 20-pin cable can also be used, in which case you would plug the 20-pin cable in on the pin #1 end of the carrier board’s ATX power supply connector and leave the two pairs of pins on the other end exposed. No adapter is required. When multiple fans are used, additional amperage is required. For example, if a 4U chassis with two fans has 2A surge current for each fan, 16A is required (12A + 2A + 2A). CD-ROM A USB CD-ROM or IDE CD-ROM drive is usually required for you to install the operating system and other software. Hard disk Standard computer IDE and SATA hard disks (60GB, 80GB, 120GB, etc.) can be attached to the CR100 carrier board. The CR100 carrier board contains one IDE header and two SATA headers. Keyboard and mouse The CR100 carrier board supports a standard USB keyboard and USB mouse. The CR100 does not support the use of a PS/2 keyboard or mouse. 12 2 Video devices Video devices DVI and VGA Monitors The CR100-2DVI carrier board contains two DVI-I ports that comply with the Digital Video Interface (DVI) specification. Dual independent displays can be used with the appropriate drivers installed. Alternatively, you can attach a single analog VGA monitor to one of the DVI-I ports. For detailed instructions, see Connect internal devices and set jumpers on page 26. NOTE Connection of a VGA monitor with a DB15 cable connector to the DVI port requires a VGA-to-DVI adapter (see Video adapter on page 10). The CR100-PCIE16 carrier board is designed to use a PCI Express graphics card in the PCI Express x16 graphics slot for high-performance graphics acceleration. The two DVI-I ports on this carrier board do not support DVI monitors, but one of the ports can be used to attach a VGA monitor. For detailed instructions, see Connect internal devices and set jumpers on page 26. LVDS panel On the CR100 carrier board, a low-voltage differential signaling (LVDS) interface allows the connection of one LVDS flat panel. This attachment typically requires a custom cable. Use the LVDS interface pinout chart in the Procelerant CR100 FlexATX Carrier Board Product Manual as a guide for obtaining a suitable cable. TV or other S-Video devices Use a standard MiniDin4 male S-Video cable to connect video equipment or other S-Video compatible devices. Ethernet Use the RJ45 Ethernet port to connect to a LAN, router, or other device via Ethernet cable. For 10/100Base-T connections, a Cat 5 cable is required. A 1000Base-T connection requires a Cat5E cable. Miscellaneous attachments Additional interfaces, such as an RS-232 port, USB ports, front panel LEDs, IEEE 1394b, and backlight control, may be added to the chassis. For connector locations on the CR100 carrier board and cable selection for internal connections, refer to the Procelerant CR100 FlexATX Carrier Board Product Manual, which provides connector locations, connector pinout definitions and a list of part numbers for all carrier board connectors. 13 2 Preparing Components and Accessories 14 IDENTIFYING KEY COMPONENTS 3 This chapter describes the key components and interfaces on the COM Express module and CR100 carrier board. COM Express module layout Figure 2 and Figure 3 show the main components of COM Express modules. For features and functionality of these components, refer to the Product Manual. Figure 2. COM Express module top view BIOS operation mode header DDR2 SO-DIMM memory socket CPU Mobile Intel 915GM Express chipset POST LED (D5) Intel 82573V Phoenix FirstBIOS Intel ICH6-M Reset LED (D4) Ethernet controller Notebook (Pro) BIOS 15 3 Identifying Key Components Figure 3. COM Express module bottom view Board-to-board interconnector CR100 carrier board layout For locations of key components on the CR100 carrier board, refer to the Procelerant CR100 FlexATX Carrier Board Product Manual. 16 ASSEMBLING THE MODULE AND CARRIER BOARD 4 Install the memory module 1. Insert one memory module into the lower DDR2 SO-DIMM memory socket. Press down on the corners of the memory module until the latches click into place. Press firmly into place Memory module latches 2. To remove a memory module, open the latches on both sides of the memory socket, lift the free end of the memory module, and remove it from the socket. 17 4 Assembling the Module and Carrier Board Install the fansink 1. Apply the Thermstrate TC phase-change material to the processor, GMCH, and ICH6-M chipsets. When assembled, heat from the chips will be conducted through the thermal interfaces to the fansink. 2. Install the heatsink spacer and module screw through the module as shown below. The screw will secure the fansink. Heatsink spacer and module screw 18 4 Install the fansink 3. Check the bottom side of the fansink for correct alignment against the module. Against CPU Against mobile Intel 915GM For heatsink spacer Against Intel Express chipset and module screw ICH6-M 19 4 Assembling the Module and Carrier Board 4. Place the fansink assembly on the module as shown, lining up the standoffs on the fansink with the screw holes in the module. 20 4 Install the fansink 5. Hold the module and fansink together and turn them over. Tighten the module screw to a torque value of 0.34 N·m (3 lbf·in). WARNING To avoid damaging the module, be careful not to overtighten the screws. Module screw 21 4 Assembling the Module and Carrier Board 6. Place the heatsink backer plate on the module as shown. Tighten the supplied backer plate screws until they reach the PCB, and then back off 1/2 turn. WARNING To avoid damaging the module, be careful not to overtighten the screws. M2 flat head backer plate screws Heatsink backer plate 22 4 Install the fansink 7. Turn the assembly over again, and insert the five heatsink screws through their washers and into the holes at the locations shown. Heatsink screws and washers 8. The heatsink screws will protrude through the module. Use the five 5mm standoffs shown, and tighten the screws to a torque value of 0.34 N·m (3 lbf·in). 5mm standoffs 23 4 Assembling the Module and Carrier Board 9. RadiSys recommends you place the assembly in a temperature chamber at a temperature of 60ºC for 10 minutes to allow the thermal interface material to phase change and conform to an optimal shape between the chips and fansink. WARNING The CPU may be damaged if this step is not performed prior to operating the system. As an alternative to using a temperature chamber, you can perform this step immediately after assembling the system by temporarily covering the fansink to trap heat and elevate the temperature. To verify that the temperature reaches 60ºC, enter the BIOS Setup utility by pressing F2 during system boot, and navigate to the Information > System Monitors submenu. After 10 minutes of operation at 60ºC, be sure to uncover the fansink before using the system further. This completes the assembly of the module and fansink. Install the module assembly on the carrier board 1. Line up the board-to-board-carrier interconnectors on the module and the CR100 carrier board as shown, then press the connectors firmly into place. Board-to-board interconnector WARNING To avoid damaging any components, make sure the COM Express module is firmly seated in the CR100 board’s interconnectors before using screws to complete the assembly. When the module is fully seated, its five standoffs should be touching the CR100 carrier board. 24 4 Install the module assembly on the carrier board 2. Plug the fan’s 3-wire cable into the processor fan connector on the CR100 carrier board. 3. Insert the five carrier screws through the back of the CR100 carrier board at the locations shown, then tighten the screws to a torque value of 0.3136N·m (2.78 lbf·in). WARNING Do not overtighten the screws, or the CR100 carrier board may be damaged. Carrier screws 25 4 Assembling the Module and Carrier Board Install the CR100 carrier board in the chassis 1. Prepare a chassis designed to accept a standard FlexATX-sized board. 2. Remove any I/O shielding included with the chassis, and replace it with the CR100 carrier board’s I/O shielding from RadiSys. 3. Fit the module and carrier board assembly into the chassis and snap the carrier board’s rear I/O panel into the I/O shielding. Note To avoid electromagnetic interference, ensure that the springs on the I/O shielding are in full contact with the CR100 carrier board's rear I/O panel. 4. Use the screws and standoffs supplied with the chassis to mount the carrier board. Torque values vary according to the size and material of the screws used. Check with your chassis manufacturer for the recommended torque values of any screws they provide. Connect internal devices and set jumpers This section gives the procedure for connecting internal devices to the CR100 carrier board, such as disk drives and LAN cards, and configuring jumper settings. 1. Connect the following internal devices to connectors on the carrier board as needed. The installation order is not important. Device to connect CR100 connector Cable type Up to two internal USB devices Internal USB headers Standard 5-pin USB cable PCI Express x1 device, such as a LAN card PCI Express x1 slot N/A One IDE device, such as a CD-ROM drive or IDE header Standard IDE cable, complies with the hard disk drive ATAPI industrial specification Up to two SATA devices, such as hard disk SATA connectors Standard SATA cable, compliant with drives SATA specification 1.0 One LVDS flat panel LVDS flat panel connector Standard 30-pin LVDS cable One backlight control connector for the Backlight control connector Custom; attaches to 7-pin 1.25mm LVDS flat panel header For further information about attaching devices, refer to the Procelerant CR100 FlexATX Carrier Board Product Manual. 2. If you have a CR100-2DVI carrier board, you may need to specify which DVI-I connector will output VGA signals with the 2-pin DVI output selection header. For instructions on connecting a DVI digital video monitor or analog VGA monitor, see Connect external I/O devices and chassis components on page 28. Pins 1 and 2 jumpered (default)—Obtains an alog VGA output from the secondary DVI-I port J2 Pins 1 and 2 open—Obtains VGA output from the primary DVI-I port J1 26 4 Connect internal devices and set jumpers 3. If you have a CR100-PCIE16 carrier board, insert a PCI Express graphics card into the PCI Express x16 graphics slot. 4. The 2-pin boot BIOS selection header specifies whether the system will use the BIOS on the carrier board or the BIOS on the module when booting: Pins 1 and 2 open (default)—The system will boot from the COM Express module BIOS, ® which is based on the Phoenix FirstBIOS™ Notebook (Pro) BIOS with RadiSys extensions. Pins 1 and 2 jumpered—The system will boot from the carrier board BIOS. Note Refer to the Procelerant CR100 FlexATX Carrier Board Product Manual if you plan to install a BIOS chip on the CR100 carrier board. 5. Connect the power supply to the 24-pin ATX PSU connector on the CR100 carrier board. 1 The power supply connector must be a 24-pin or 20-pin connector that complies with ATX Specification Version 2.2. 6. Connect the power switch and LED indicator cables to the front panel I/O header. Pin #1 is marked by an asterisk (*) on the CR100 carrier board. Function Cable setting 119 Hard disk drive LED Pins 1 and 3: 1: HDD LED cathode (to VCC, typically white in 220 two-wire cables) 3: HDD LED anode (from HD_ACT#) Reset switch Pins 5 and 7 Power-on switch Pins 6 and 8 Speaker Pins 10 through 16: 10: 5V supply 12: Audio signal (speaker) 14: Not connected 16: Audio signal (speaker) Note The CR100 carrier board does not support the power LED indicator. If you have a custom carrier board that supports this function, make sure that you connect the cathode and anode of the power LED cable correctly. 1 If a 20-pin cable is used, plug the 20-pin cable in to the pin #1 end of the connector, and leave the two pairs of pins on the other end exposed. No adaptor is required. Pin #1 is marked by an asterisk (*) on the CR100 carrier board. 27 4 Assembling the Module and Carrier Board Connect external I/O devices and chassis components Connect external devices to the connectors on the rear I/O panel of the CR100 carrier board. 1. Connect the keyboard and mouse to any of the USB ports. 2. If you have a CR100-2DVI carrier board, connect one or two monitors according to your needs. Assuming you have left the jumper in the DVI output selection header to enable VGA output on the secondary DVI-I connector: Connect a digital video monitor to the primary DVI-I connector. Connect a VGA monitor to the secondary DV I-I connector. If the VGA monitor cable has a DB15 connector, you will need a DVI-to-VGA adaptor as shown below (RadiSys product code CE-DVI-VGA). DVI side of adaptor VGA side of adaptor 3. If you have a CR100-PCIE16 carrier board, connect one or more displays to the PCI Express graphics card according to the instructions provided with the graphics card. 4. Connect the following devices to external ports on the rear I/O panel as needed. The installation order is not important. For additional information, refer to the Product Manual and the Procelerant CR100 FlexATX Carrier Board Product Manual. Device to connect CR100 connector Cable type TV or other S-Video–compatible S-Video output port (located on Standard MiniDin4 male S-Video device front of CR100 carrier board) cable LAN, router, or other Ethernet Ethernet port For 10/100Base-T connections, a device Cat5 cable is required; for 1000Base-T, a Cat5E cable is required. Microphone and speaker Audio jacks Standard audio cables with 3.5mm male connectors NOTE The CR100 carrier board does not provide an on-board PC speaker. It is recommended that you connect an external speaker to the front panel I/O header in order to hear diagnostic sounds during system boot. 28 4 Power on the system Power on the system 1. If an LVDS flat panel is attached and requires an external power supply, power it up before powering up the system. Otherwise, the panel’s power supply will be provided by the CR100 carrier board via the backlight control connector. 2. Plug in the power supply. The system should automatically power on the first time the power supply is connected, but you may have to press the power button on the chassis (if connected) or the power button on the CR100 carrier board. Check the BIOS settings It is a good idea to check the BIOS settings before installing the operating system to make sure the default settings are appropriate for devices you have installed. To enter the BIOS Setup utility, press F2 during system boot. After installing the operating system, you may also want to change the boot order in the BIOS, so that the hard disk is checked first. If problems are encountered during boot up, error messages may be displayed on the monitor. You can also use a POST card to determine where the system encountered problems. Online help is provided in the BIOS setup to explain options. For further information, refer to the Product Manual. 29 4 Assembling the Module and Carrier Board 30 INSTALLING OPERATING SYSTEM AND DRIVERS 5 Install the operating system ® ® The COM Express module runs under Microsoft Windows XP, Windows XP Embedded, and ® Red Hat Desktop (version 4.0 or later). Contact RadiSys to verify support of other operating systems. Install the operating system using a bootable CD-ROM. Follow the installation instructions provided with the operating system. Install drivers This sections lists the drivers you need to install with supported operating systems. Drivers are available for download from RadiSys Web site, www.radisys.com/service_support. Search for “Procelerant CE“ by product name, and then click “Procelerant CE915GM.“ Microsoft Windows XP and Windows XP Embedded Install the Intel chipset drivers first. Other drivers can be installed in any order, and include the following: Intel 915GM video card driver HDA for STAC9200 audio driver 10/100/1000M Base-T Ethernet device driver Dual-DVI driver (optional, for dual-DVI output) Red Hat Desktop Intel 915GM video card driver (does not support 3D graphics) HDA for STAC9200 audio driver Intel Gigabit network driver 31 5 Installing Operating System and Drivers 32
Frequently asked questions
How does Industrial Trading differ from its competitors?

Is there a warranty for the CE915GM?
Which carrier will Industrial Trading use to ship my parts?
Can I buy parts from Industrial Trading if I am outside the USA?
Which payment methods does Industrial Trading accept?
Why buy from GID?

Quality
We are industry veterans who take pride in our work

Protection
Avoid the dangers of risky trading in the gray market

Access
Our network of suppliers is ready and at your disposal

Savings
Maintain legacy systems to prevent costly downtime

Speed
Time is of the essence, and we are respectful of yours
Related Products
Radisys 97-9025-02 CPU Board with Socket 370 and 2 memory slots

RadiSys Endura BG845G Motherboard, Intel Pentium 4 Processor, and Intel 845GV + ICH4 Chipset
Request a Quote

The quote request has been received
Close

Facing challenges or have inquiries? Feel free to contact us!
Call Us +1-469-283-2440
What they say about us
FANTASTIC RESOURCE
One of our top priorities is maintaining our business with precision, and we are constantly looking for affiliates that can help us achieve our goal. With the aid of GID Industrial, our obsolete product management has never been more efficient. They have been a great resource to our company, and have quickly become a go-to supplier on our list!
Bucher Emhart Glass
EXCELLENT SERVICE
With our strict fundamentals and high expectations, we were surprised when we came across GID Industrial and their competitive pricing. When we approached them with our issue, they were incredibly confident in being able to provide us with a seamless solution at the best price for us. GID Industrial quickly understood our needs and provided us with excellent service, as well as fully tested product to ensure what we received would be the right fit for our company.
Fuji
HARD TO FIND A BETTER PROVIDER
Our company provides services to aid in the manufacture of technological products, such as semiconductors and flat panel displays, and often searching for distributors of obsolete product we require can waste time and money. Finding GID Industrial proved to be a great asset to our company, with cost effective solutions and superior knowledge on all of their materials, it’d be hard to find a better provider of obsolete or hard to find products.
Applied Materials
CONSISTENTLY DELIVERS QUALITY SOLUTIONS
Over the years, the equipment used in our company becomes discontinued, but they’re still of great use to us and our customers. Once these products are no longer available through the manufacturer, finding a reliable, quick supplier is a necessity, and luckily for us, GID Industrial has provided the most trustworthy, quality solutions to our obsolete component needs.
Nidec Vamco
TERRIFIC RESOURCE
This company has been a terrific help to us (I work for Trican Well Service) in sourcing the Micron Ram Memory we needed for our Siemens computers. Great service! And great pricing! I know when the product is shipping and when it will arrive, all the way through the ordering process.
Trican Well Service
GO TO SOURCE
When I can't find an obsolete part, I first call GID and they'll come up with my parts every time. Great customer service and follow up as well. Scott emails me from time to time to touch base and see if we're having trouble finding something.....which is often with our 25 yr old equipment.
ConAgra Foods